Moving the indicator into scripts and IndicatorsFactory.

Similar to the way we previously considered connecting robots in the form of scripts, OsEngine supports the ability to connect indicators as external text files with the .cs extension. This approach provides additional flexibility, allowing for the connection of indicators to the project without the need for recompilation, as well as the convenience of transferring scripts to new builds.
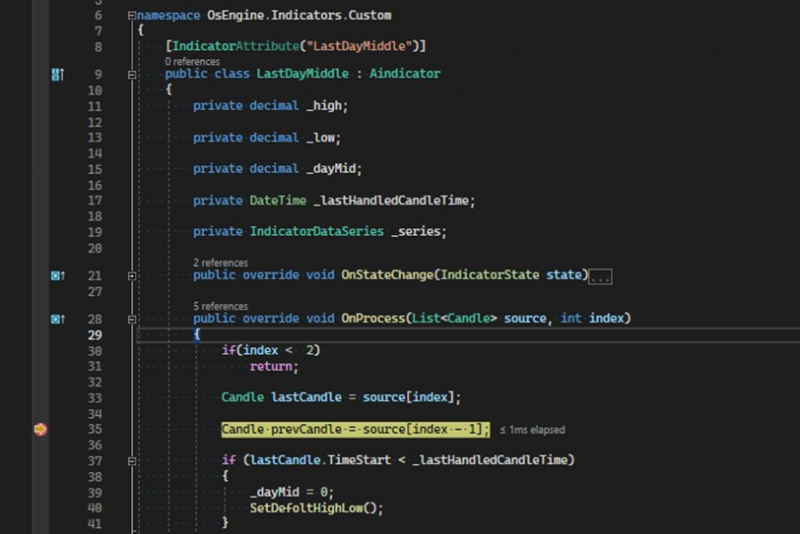
Let's assume you want to share an indicator with someone or simply transfer it to a new version of the software. You can do this by connecting the indicator as an external file. Let's connect our indicator, created in the last article, to a different version of the terminal. Before doing so, you need to remove the IndicatorAttribute attribute from the indicator class:

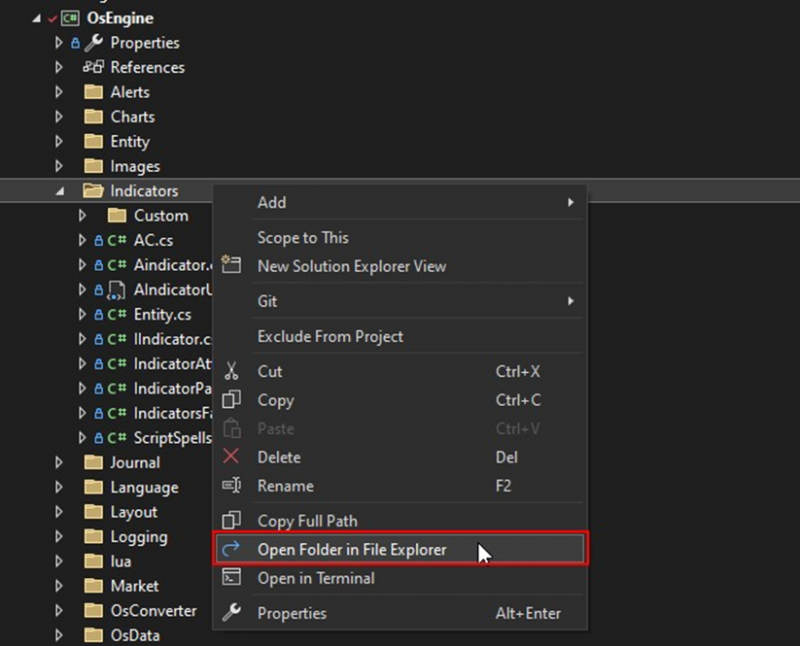
Next, copy the LastDayMiddle.cs file from the folder it was created in. In our case, this is - OsEnginev1\project\OsEngine\Indicators\Custom to the folder OsEnginev2\project\OsEngine\bin\Debug\Custom\Indicators\Scripts\, which is located in the project of another instance of OsEngine. You can open the required folder directly from Visual Studio. To do this, in the Solution Explorer, right-click on the desired folder and select "Open Folder in File Explorer":
After completing the described actions, you simply need to restart the target terminal, and the indicator will appear in the list of available ones.
If you need the ability to edit the code and run the indicator in debug mode in the target terminal's project, you do not need to remove the IndicatorAttribute, but simply comment it out.
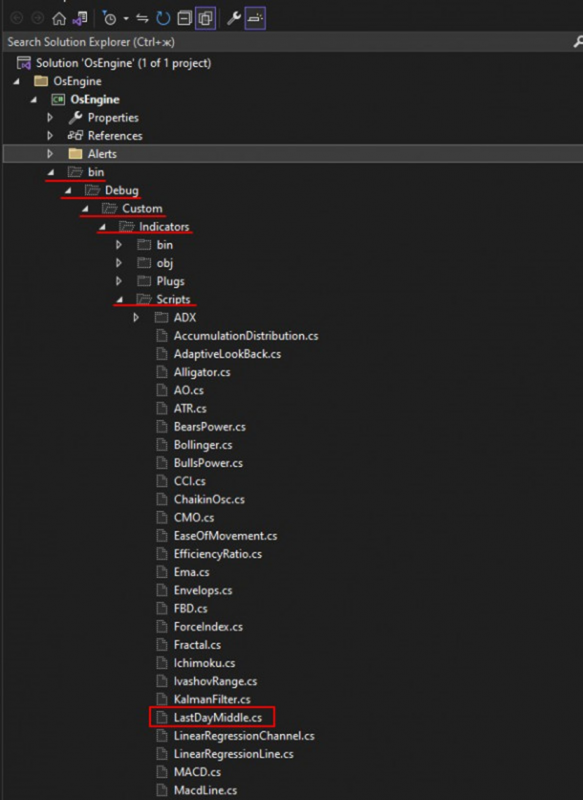
To launch the indicator in debug mode, you can perform the same actions in reverse order, only in the same version of the project. But there is a more elegant solution: open the Solution Explorer, click the "Show All Files" button:

Next, all files in the solution will be displayed. Expand to the place where the scripts are located:
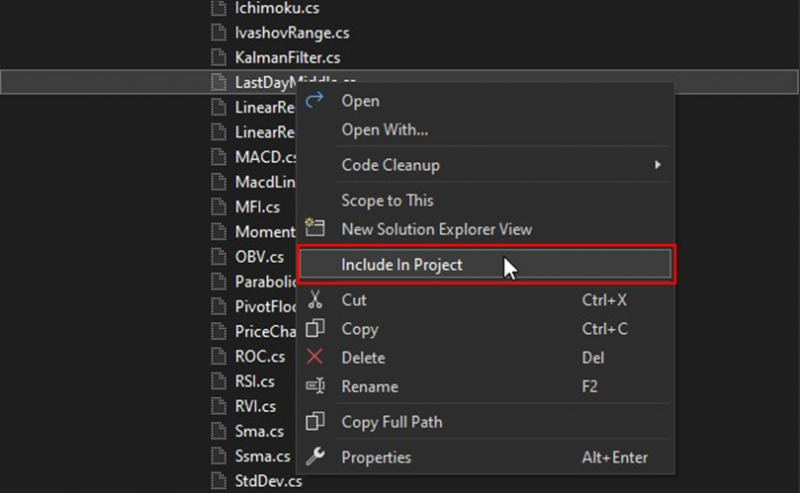
Select the required script with RMB (Right Mouse Button) and click "Include In Project":
Click the "Show All Files" button again to hide unnecessary directories. Then return the IndicatorAttribute to the indicator, and now it is available for debugging:
If the script indicator needs to include additional libraries, you need to place it in a separate folder and create a subfolder in it named "Dlls". In this folder, you need to place all the necessary assemblies. The compiler will automatically load them when compiling the indicator.
If you have any difficulties or questions, please write to the support chat. Link