Mandatory class members to implement in BotPanel. Creating a robot through Attribute.

In the BotPanel class, there are several abstract members that need to be implemented in the derived classes.
In simple terms, you need to create several required methods after you start creating your robot.
Let's consider an example of creating a robot. An empty one, but which will already be visible to the tester.
Step 1. Create a class MyFirstSimpleBot in the project.

Step 2. Add using directives.
This is needed to include the necessary libraries and namespaces in the robot:
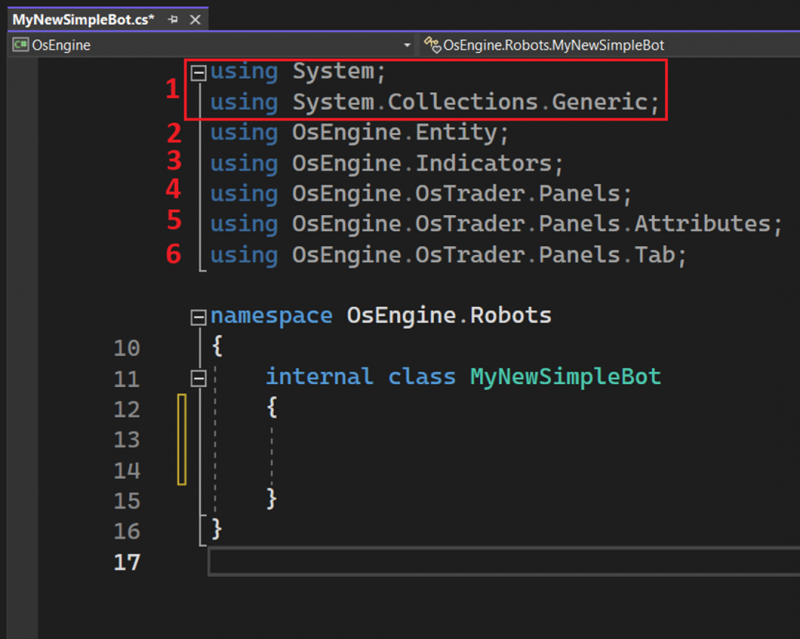
1. These are system components. To access standard data types of C# and collections (we will need lists of type List<>).
2. These are primitives in OsEngine. Candles, trades, orders, and everything else.
3. These are indicators and everything related.
4. Here is the parent class for all robots that we will use.
5. This helps to register the robot in the system through class attributes, which is very convenient.
6. Here are all the data sources stored in OsEngine.
Step 3. Make the class understand that it is a robot. Inherit from BotPanel.
To do this, after the class name, put a colon and write BotPanel. After that, create the required class members for BotPanel. It should look like this:
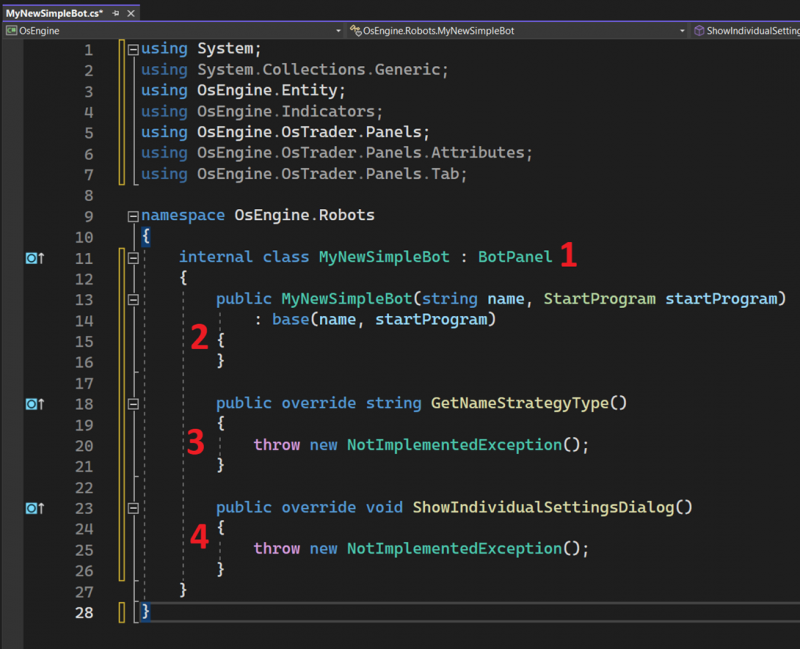
1. Inheritance. Once you write this (: BotPanel), the program will understand that you are creating a robot for OsEngine.
2. You need to define a constructor. In it, we will set the initial state of the robot, declare the sources, and subscribe to events.
3. Method to store the name of the robot. We will implement it a bit later.
4. Method that calls the unique robot window. We won’t have it, so we will simply remove everything inside the method.
Step 4. Give the robot a name.
For this, we need to refine the source code in two places:
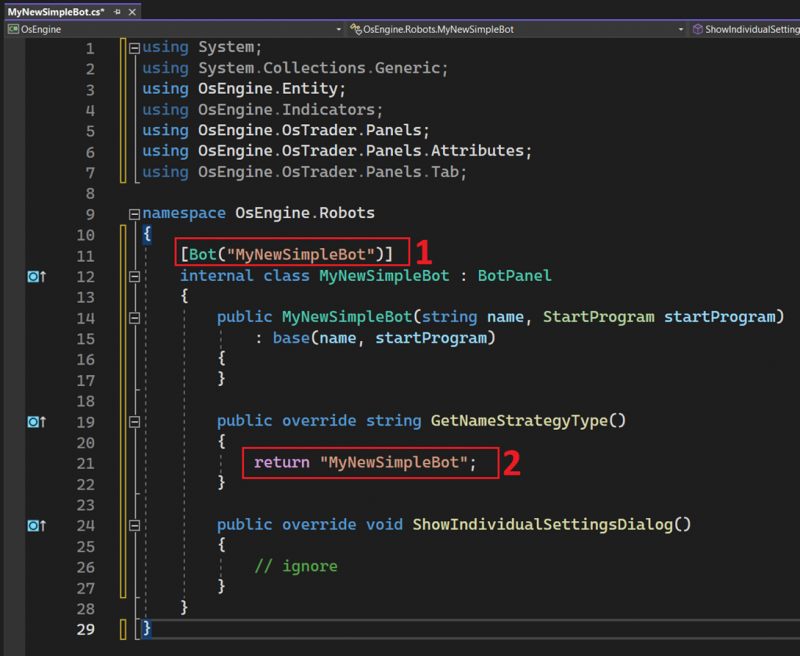
1. Add the attribute. Inside the brackets, write the EXACT name of our class.
2. Add the return value in the method GetNameStrategyType. Inside the brackets, the exact name of our class should also be there.
Step 5. Create a single source BotTabSimple.
Go to the constructor and create a source for connecting to one instrument. It should look like this:
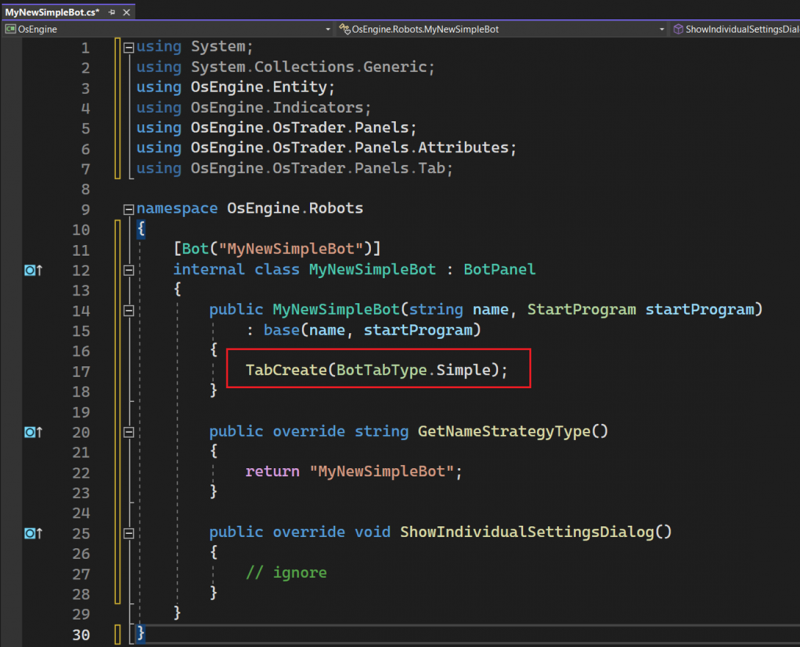
In the red square is the method call that creates the sources. In this case, sources of type Simple.
Step 6. Save the source BotTabSimple as a class field.
To do this, you need to create a field in the class and save a reference to the source in it. Like this:

1. Create a variable of type BotTabSimple. Outside of methods so that it is visible in the robot.
2. In the constructor, we will assign the previously created source to this variable and will refer to the source using this reference further.
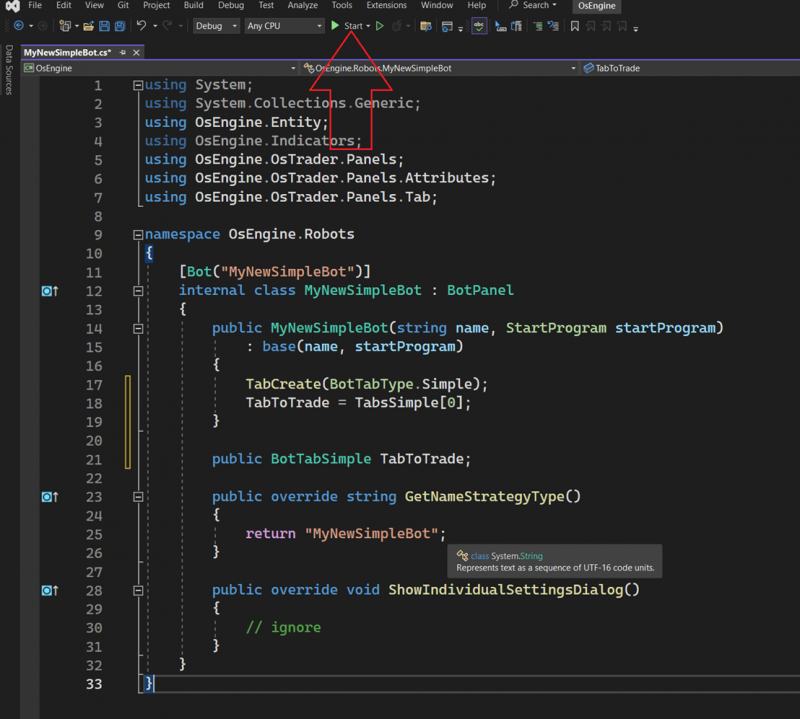
Step 7. Done! Launch the tester and configure the source!
Run the project. This is the button in Visual Studio. You must compile the project:
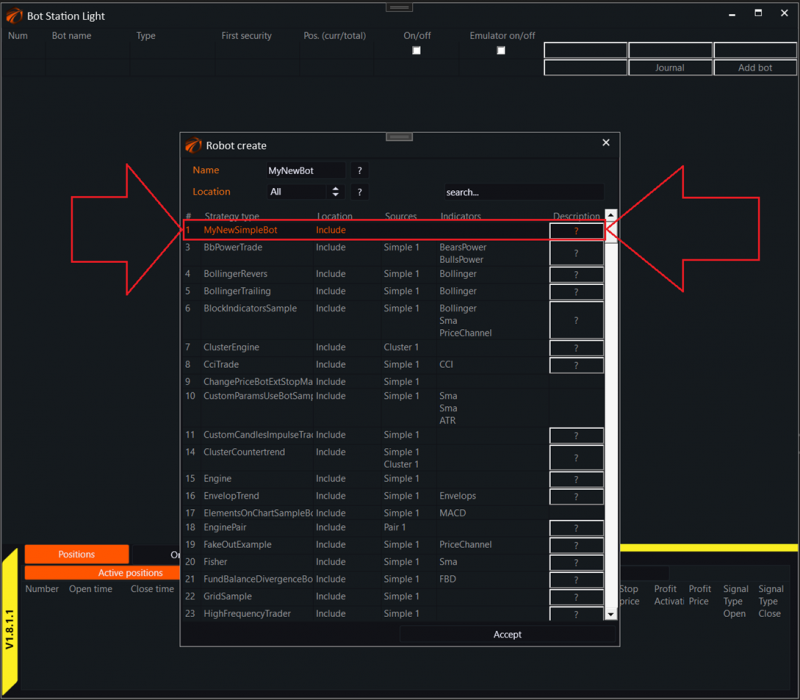
Select the tester. And when we click the add robot button, we see our “MyNewSimpleBot”:
Happy algorithm development!
If you have any difficulties or questions, please write to the support chat. Link